Overview
Email notifications are one of the most important channels for user communication. Pingram makes it easy to send personalized, professional emails with advanced features like parameters, attachments, CC/BCC, and tracking.
This guide covers everything you need to know about sending emails, from basic setup to advanced features.
Step 1: Create your account and first notification
- Create your Pingram account and complete the onboarding. Sign up for free.
- In the dashboard, create your first notification and enable the Email channel.
- Note the notification’s Type (e.g.,
welcome_email). You’ll use this later in the send step.
Step 2: Install the SDK
In the dashboard send step, the first thing you’ll need to do is install the SDK. Select the appropriate language and follow the instructions.
Install the node package using one of the following package managers:
npm install pingramyarn add pingrampnpm add pingrampip install pingram-pythoncomposer require pingram/phpgo get github.com/pingram-io/pingram-godotnet add package PingramAdd the Pingram dependency to your pom.xml. Check Maven Central for the latest version.
<dependencies>
    <dependency>
        <groupId>io.pingram</groupId>
        <artifactId>pingram</artifactId>
        <version>0.1.0</version>
    </dependency>
</dependencies>
gem install pingramOr add to your Gemfile: gem 'pingram'
Step 3: Send an Email Notification
The next part of the send step is to send the notification from your backend. Here’s how to send an email notification by passing the email content directly:
Replace the type value (e.g., welcome_email) with the notification Type
you noted in Step 1, and use your API key (pingram_sk_…). You can find it in
the Environments section of the Pingram dashboard.
import { Pingram } from 'pingram';

// Initialize (default US region)
// For CA region: add region: 'ca' on new line after apiKey
// For EU region: add region: 'eu' on new line after apiKey
const pingram = new Pingram({
  apiKey: 'Your apiKey'
});

// Send email notification
pingram.send({
  type: 'welcome_email',
  to: {
    id: 'user123',
    email: 'user@example.com' // Required for email notifications
  },
  email: {
    subject: 'Welcome to Acme Corp',
    html: '<h1>Welcome!</h1><p>Thanks for joining Acme Corp.</p>',
    senderName: 'Acme Team',
    senderEmail: 'hello@acme.com'
  }
});
import asyncio
from pingram import Pingram
async def send_email():
async with Pingram(api_key="pingram_sk_...") as client:
await client.send({
"type": "welcome_email",
"to": {
"id": "user123",
"email": "user@example.com" # Required for email notifications
},
"email": {
"subject": "Welcome to Acme Corp",
"html": "<h1>Welcome!</h1><p>Thanks for joining Acme Corp.</p>",
"senderName": "Acme Team",
"senderEmail": "hello@acme.com"
}
})
# Run the async function
asyncio.run(send_email())use Pingram\Client;
use Pingram\Model\SenderPostBody;
$client = new Client('pingram_sk_...');
$body = new SenderPostBody([
'type' => 'welcome_email',
'to' => [
'id' => 'user123',
'email' => 'user@example.com' // Required for email notifications
],
'email' => [
'subject' => 'Welcome to Acme Corp',
'html' => '<h1>Welcome!</h1><p>Thanks for joining Acme Corp.</p>',
'senderName' => 'Acme Team',
'senderEmail' => 'hello@acme.com'
]
]);
$client->send($body);package main
import (
"context"
"log"
pingram "github.com/pingram-io/pingram-go"
)
func main() {
client := pingram.NewClient("pingram_sk_...") // Your secret API key
body := pingram.SenderPostBody{
Type: pingram.PtrString("welcome_email"),
User: &pingram.GetUsersResponseUsersInner{
Id: "user123",
Email: pingram.PtrString("user@example.com"), // Required for email notifications
},
Email: &pingram.SenderPostBodyEmail{
Subject: "Welcome to Acme Corp",
Html: "<h1>Welcome!</h1><p>Thanks for joining Acme Corp.</p>",
SenderName: pingram.PtrString("Acme Team"),
SenderEmail: pingram.PtrString("hello@acme.com"),
},
}
_, _, err := client.DefaultAPI.Send(context.Background()).SenderPostBody(body).Execute()
if err != nil {
log.Fatal(err)
}
}using Pingram;
using Pingram.Model;
var client = new PingramClient("your_api_key");
var body = new SenderPostBody
{
Type = "welcome_email",
To = new SenderPostBodyTo { Id = "user123", Email = "user@example.com" },
Email = new SenderPostBodyEmail("Welcome to Acme Corp", "<h1>Welcome!</h1><p>Thanks for joining Acme Corp.</p>")
{
SenderName = "Acme Team",
SenderEmail = "hello@acme.com"
}
};
await client.SendAsync(body);package com.example;
import io.pingram.Pingram;
import io.pingram.model.*;
public class Example {
public static void main(String[] args) {
Pingram pingram = new Pingram("pingram_sk_..."); // Your secret API key
SenderPostBodyTo to = new SenderPostBodyTo()
.id("user123")
.email("user@example.com");
SenderPostBody body = new SenderPostBody()
.type("welcome_email")
.to(to)
.email(new SenderPostBodyEmail()
.subject("Welcome to Acme Corp")
.html("<h1>Welcome!</h1><p>Thanks for joining Acme Corp.</p>")
.senderName("Acme Team")
.senderEmail("hello@acme.com")
);
SenderPostResponse response = pingram.send(body);
System.out.println("Tracking ID: " + response.getTrackingId());
}
}require 'pingram'
client = Pingram::Client.new(api_key: 'pingram_sk_...')
body = Pingram::SenderPostBody.new(
type: 'welcome_email',
to: { id: 'user123', email: 'user@example.com' },
email: {
subject: 'Welcome to Acme Corp',
html: '<h1>Welcome!</h1><p>Thanks for joining Acme Corp.</p>'
}
)
client.send(body)You’re All Set!
🎉 Congrats! You’re now sending notifications!
If you’d like to send using templates configured in the Dashboard, check out our Templating guide and Backend Integration, or explore more advanced features below.
Advanced Email Features
Email with Attachments
You can send files as email attachments using either of two methods:
- URL-based attachments: Use this method when your file is already hosted online and can be reached by Pingram via a public or signed URL. Make sure the URL you provide is accessible at the time the email is sent - Pingram needs to be able to fetch the file directly from that address. This is efficient for static or previously uploaded files.
- Base64 content attachments: Use when your file is dynamically generated, privately held, or not accessible online. This lets you embed the file’s data directly in the request - no external hosting required.
Choose the approach that best fits how and where your file is stored or generated.
pingram.send({
  type: 'invoice_email',
  to: {
    id: 'user123',
    email: 'user@example.com'
  },
  email: {
    subject: 'Your Invoice INV-001',
    html: '<h1>Invoice</h1><p>Amount: $99.99</p>'
  },
  options: {
    email: {
      attachments: [
        {
          filename: 'invoice1.pdf',
          url: 'https://example.com/files/invoice.pdf'
        },
        {
          filename: 'invoice2.pdf',
          content: 'FILE_CONTENT_IN_BASE64',
          contentType: 'application/pdf'
        }
      ]
    }
  }
});
async with Pingram(api_key="pingram_sk_...") as client:
await client.send({
"type": "invoice_email",
"to": {
"id": "user123",
"email": "user@example.com"
},
"email": {
"subject": "Your Invoice INV-001",
"html": "<h1>Invoice</h1><p>Amount: $99.99</p>"
},
"options": {
"email": {
"attachments": [
{
"filename": "invoice1.pdf",
"url": "https://example.com/files/invoice.pdf"
},
{
"filename": "invoice2.pdf",
"content": "FILE_CONTENT_IN_BASE64",
"contentType": "application/pdf"
}
]
}
}
})$body = new SenderPostBody([
'type' => 'invoice_email',
'to' => ['id' => 'user123', 'email' => 'user@example.com'],
'email' => [
'subject' => 'Your Invoice INV-001',
'html' => '<h1>Invoice</h1><p>Amount: $99.99</p>'
],
'options' => [
'email' => [
'attachments' => [
['filename' => 'invoice1.pdf', 'url' => 'https://example.com/files/invoice.pdf'],
['filename' => 'invoice2.pdf', 'content' => 'FILE_CONTENT_IN_BASE64', 'contentType' => 'application/pdf']
]
]
]
]);
$client->send($body);package main
import (
"context"
"log"
pingram "github.com/pingram-io/pingram-go"
)
func main() {
client := pingram.NewClient("pingram_sk_...")
contentType := "application/pdf"
body := pingram.SenderPostBody{
Type: pingram.PtrString("invoice_email"),
User: &pingram.GetUsersResponseUsersInner{Id: "user123", Email: pingram.PtrString("user@example.com")},
Email: &pingram.SenderPostBodyEmail{
Subject: pingram.PtrString("Your Invoice INV-001"),
Html: pingram.PtrString("<h1>Invoice</h1><p>Amount: $99.99</p>"),
},
Options: &pingram.SenderPostBodyOptions{
Email: &pingram.SenderPostBodyOptionsEmail{
Attachments: []pingram.SenderPostBodyOptionsEmailAttachmentsInner{
{SenderPostBodyOptionsEmailAttachmentsInnerAnyOf: pingram.NewSenderPostBodyOptionsEmailAttachmentsInnerAnyOf("invoice1.pdf", "https://example.com/files/invoice.pdf")},
{SenderPostBodyOptionsEmailAttachmentsInnerAnyOf1: &pingram.SenderPostBodyOptionsEmailAttachmentsInnerAnyOf1{
Filename: "invoice2.pdf",
Content: "FILE_CONTENT_IN_BASE64",
ContentType: &contentType,
}},
},
},
},
}
_, _, err := client.DefaultAPI.Send(context.Background()).SenderPostBody(body).Execute()
if err != nil {
log.Fatal(err)
}
}using Pingram;
using Pingram.Model;
var client = new PingramClient("your_api_key");
// Attachment by URL; for content+contentType use SenderPostBodyOptionsEmailAttachmentsInnerAnyOf1
var attachmentByUrl = new SenderPostBodyOptionsEmailAttachmentsInner(
new SenderPostBodyOptionsEmailAttachmentsInnerAnyOf("invoice1.pdf", "https://example.com/files/invoice.pdf"),
default);
var body = new SenderPostBody
{
Type = "invoice_email",
To = new SenderPostBodyTo { Id = "user123", Email = "user@example.com" },
Email = new SenderPostBodyEmail("Your Invoice INV-001", "<h1>Invoice</h1><p>Amount: $99.99</p>"),
Options = new SenderPostBodyOptions(new SenderPostBodyOptionsEmail(attachments: new List<SenderPostBodyOptionsEmailAttachmentsInner?> { attachmentByUrl }))
};
await client.SendAsync(body);import java.util.List;
SenderPostBodyTo to = new SenderPostBodyTo()
.id("user123")
.email("user@example.com");
// URL-based attachment
SenderPostBodyOptionsEmailAttachmentsInner urlAttachment = new SenderPostBodyOptionsEmailAttachmentsInner()
.filename("invoice1.pdf")
.url("https://example.com/files/invoice.pdf");
// Base64 content attachment
SenderPostBodyOptionsEmailAttachmentsInner base64Attachment = new SenderPostBodyOptionsEmailAttachmentsInner()
.filename("invoice2.pdf")
.content("FILE_CONTENT_IN_BASE64")
.contentType("application/pdf");
SenderPostBodyOptionsEmail emailOptions = new SenderPostBodyOptionsEmail()
.attachments(List.of(urlAttachment, base64Attachment));
SenderPostBody body = new SenderPostBody()
.type("invoice_email")
.to(to)
.email(new SenderPostBodyEmail()
.subject("Your Invoice INV-001")
.html("<h1>Invoice</h1><p>Amount: $99.99</p>")
)
.options(new SenderPostBodyOptions()
.email(emailOptions)
);
SenderPostResponse response = pingram.send(body);require 'pingram'
client = Pingram::Client.new(api_key: 'pingram_sk_...')
body = Pingram::SenderPostBody.new(
type: 'invoice_email',
to: { id: 'user123', email: 'user@example.com' },
email: { subject: 'Your Invoice INV-001', html: '<h1>Invoice</h1><p>Amount: $99.99</p>' },
options: {
email: {
attachments: [
{ filename: 'invoice1.pdf', url: 'https://example.com/files/invoice.pdf' },
{ filename: 'invoice2.pdf', content: 'FILE_CONTENT_IN_BASE64', content_type: 'application/pdf' }
]
}
}
)
client.send(body)Use only the raw base64 string (no data: prefix). Set contentType when it
cannot be inferred from the filename.
CC and BCC Recipients
Send copies of your email to additional recipients:
pingram.send({
  type: 'team_update',
  to: {
    id: 'primary-user',
    email: 'primary@example.com'
  },
  email: {
    subject: 'Team Update: Website Redesign',
    html: '<p>Status Update: New features are now available!</p>'
  },
  options: {
    email: {
      ccAddresses: ['manager@example.com', 'team-lead@example.com'],
      bccAddresses: ['compliance@example.com']
    }
  }
});
async with Pingram(api_key="pingram_sk_...") as client:
await client.send({
"type": "team_update",
"to": {
"id": "primary-user",
"email": "primary@example.com"
},
"email": {
"subject": "Team Update: Website Redesign",
"html": "<p>Status Update: New features are now available!</p>"
},
"options": {
"email": {
"ccAddresses": ["manager@example.com", "team-lead@example.com"],
"bccAddresses": ["compliance@example.com"]
}
}
})$body = new SenderPostBody([
'type' => 'team_update',
'to' => ['id' => 'primary-user', 'email' => 'primary@example.com'],
'email' => [
'subject' => 'Team Update: Website Redesign',
'html' => '<p>Status Update: New features are now available!</p>'
],
'options' => [
'email' => [
'ccAddresses' => ['manager@example.com', 'team-lead@example.com'],
'bccAddresses' => ['compliance@example.com']
]
]
]);
$client->send($body);package main
import (
"context"
"log"
pingram "github.com/pingram-io/pingram-go"
)
func main() {
client := pingram.NewClient("pingram_sk_...")
body := pingram.SenderPostBody{
Type: pingram.PtrString("team_update"),
User: &pingram.GetUsersResponseUsersInner{Id: "primary-user", Email: pingram.PtrString("primary@example.com")},
Email: &pingram.SenderPostBodyEmail{
Subject: pingram.PtrString("Team Update: Website Redesign"),
Html: pingram.PtrString("<p>Status Update: New features are now available!</p>"),
},
Options: &pingram.SenderPostBodyOptions{
Email: &pingram.SenderPostBodyOptionsEmail{
CcAddresses: []string{"manager@example.com", "team-lead@example.com"},
BccAddresses: []string{"compliance@example.com"},
},
},
}
_, _, err := client.DefaultAPI.Send(context.Background()).SenderPostBody(body).Execute()
if err != nil {
log.Fatal(err)
}
}using Pingram;
using Pingram.Model;
var client = new PingramClient("your_api_key");
var body = new SenderPostBody
{
Type = "team_update",
To = new SenderPostBodyTo { Id = "primary-user", Email = "primary@example.com" },
Email = new SenderPostBodyEmail("Team Update: Website Redesign", "<p>Status Update: New features are now available!</p>"),
Options = new SenderPostBodyOptions(new SenderPostBodyOptionsEmail(
ccAddresses: new List<string> { "manager@example.com", "team-lead@example.com" },
bccAddresses: new List<string> { "compliance@example.com" }))
};
await client.SendAsync(body);import java.util.List;
SenderPostBodyTo to = new SenderPostBodyTo()
.id("primary-user")
.email("primary@example.com");
SenderPostBody body = new SenderPostBody()
.type("team_update")
.to(to)
.email(new SenderPostBodyEmail()
.subject("Team Update: Website Redesign")
.html("<p>Status Update: New features are now available!</p>")
)
.options(new SenderPostBodyOptions()
.email(new SenderPostBodyOptionsEmail()
.ccAddresses(List.of("manager@example.com", "team-lead@example.com"))
.bccAddresses(List.of("compliance@example.com"))
)
);
SenderPostResponse response = pingram.send(body);require 'pingram'
client = Pingram::Client.new(api_key: 'pingram_sk_...')
body = Pingram::SenderPostBody.new(
type: 'team_update',
to: { id: 'primary-user', email: 'primary@example.com' },
email: { subject: 'Team Update: Website Redesign', html: '<p>Status Update: New features are now available!</p>' },
options: { email: { cc_addresses: ['manager@example.com', 'team-lead@example.com'], bcc_addresses: ['compliance@example.com'] } }
)
client.send(body)Reply-To Addresses
Set custom reply-to addresses for two-way email communication:
pingram.send({
  type: 'support_ticket',
  to: {
    id: 'customer123',
    email: 'customer@example.com'
  },
  email: {
    subject: 'Support Ticket TKT-456',
    html: '<p>Issue: Login problems</p>'
  },
  options: {
    email: {
      replyToAddresses: ['support@yourcompany.com']
    }
  }
});
async with Pingram(api_key="pingram_sk_...") as client:
await client.send({
"type": "support_ticket",
"to": {
"id": "customer123",
"email": "customer@example.com"
},
"email": {
"subject": "Support Ticket TKT-456",
"html": "<p>Issue: Login problems</p>"
},
"options": {
"email": {
"replyToAddresses": ["support@yourcompany.com"]
}
}
})$body = new SenderPostBody([
'type' => 'support_ticket',
'to' => ['id' => 'customer123', 'email' => 'customer@example.com'],
'email' => [
'subject' => 'Support Ticket TKT-456',
'html' => '<p>Issue: Login problems</p>'
],
'options' => [
'email' => [
'replyToAddresses' => ['support@yourcompany.com']
]
]
]);
$client->send($body);package main
import (
"context"
"log"
pingram "github.com/pingram-io/pingram-go"
)
func main() {
client := pingram.NewClient("pingram_sk_...")
body := pingram.SenderPostBody{
Type: pingram.PtrString("support_ticket"),
User: &pingram.GetUsersResponseUsersInner{Id: "customer123", Email: pingram.PtrString("customer@example.com")},
Email: &pingram.SenderPostBodyEmail{
Subject: pingram.PtrString("Support Ticket TKT-456"),
Html: pingram.PtrString("<p>Issue: Login problems</p>"),
},
Options: &pingram.SenderPostBodyOptions{
Email: &pingram.SenderPostBodyOptionsEmail{
ReplyToAddresses: []string{"support@yourcompany.com"},
},
},
}
_, _, err := client.DefaultAPI.Send(context.Background()).SenderPostBody(body).Execute()
if err != nil {
log.Fatal(err)
}
}using Pingram;
using Pingram.Model;
var client = new PingramClient("your_api_key");
var body = new SenderPostBody
{
Type = "support_ticket",
To = new SenderPostBodyTo { Id = "customer123", Email = "customer@example.com" },
Email = new SenderPostBodyEmail("Support Ticket TKT-456", "<p>Issue: Login problems</p>"),
Options = new SenderPostBodyOptions(new SenderPostBodyOptionsEmail(replyToAddresses: new List<string> { "support@yourcompany.com" }))
};
await client.SendAsync(body);import java.util.List;
SenderPostBodyTo to = new SenderPostBodyTo()
.id("customer123")
.email("customer@example.com");
SenderPostBody body = new SenderPostBody()
.type("support_ticket")
.to(to)
.email(new SenderPostBodyEmail()
.subject("Support Ticket TKT-456")
.html("<p>Issue: Login problems</p>")
)
.options(new SenderPostBodyOptions()
.email(new SenderPostBodyOptionsEmail()
.replyToAddresses(List.of("support@yourcompany.com"))
)
);
SenderPostResponse response = pingram.send(body);require 'pingram'
client = Pingram::Client.new(api_key: 'pingram_sk_...')
body = Pingram::SenderPostBody.new(
type: 'support_ticket',
to: { id: 'customer123', email: 'customer@example.com' },
email: { subject: 'Support Ticket TKT-456', html: '<p>Issue: Login problems</p>' },
options: { email: { reply_to_addresses: ['support@yourcompany.com'] } }
)
client.send(body)Custom From Address
Set a custom from address and sender name for your emails:
pingram.send({
  type: 'marketing_newsletter',
  to: {
    id: 'subscriber123',
    email: 'subscriber@example.com'
  },
  email: {
    subject: 'Your Company Newsletter',
    html: '<h1>New features are now available!</h1>'
  },
  options: {
    email: {
      fromAddress: 'newsletter@yourcompany.com',
      fromName: 'Your Company Newsletter'
    }
  }
});
async with Pingram(api_key="pingram_sk_...") as client:
await client.send({
"type": "marketing_newsletter",
"to": {
"id": "subscriber123",
"email": "subscriber@example.com"
},
"email": {
"subject": "Your Company Newsletter",
"html": "<h1>New features are now available!</h1>"
},
"options": {
"email": {
"fromAddress": "newsletter@yourcompany.com",
"fromName": "Your Company Newsletter"
}
}
})$body = new SenderPostBody([
'type' => 'marketing_newsletter',
'to' => ['id' => 'subscriber123', 'email' => 'subscriber@example.com'],
'email' => [
'subject' => 'Your Company Newsletter',
'html' => '<h1>New features are now available!</h1>'
],
'options' => [
'email' => [
'fromAddress' => 'newsletter@yourcompany.com',
'fromName' => 'Your Company Newsletter'
]
]
]);
$client->send($body);package main
import (
"context"
"log"
pingram "github.com/pingram-io/pingram-go"
)
func main() {
client := pingram.NewClient("pingram_sk_...")
body := pingram.SenderPostBody{
Type: pingram.PtrString("marketing_newsletter"),
User: &pingram.GetUsersResponseUsersInner{Id: "subscriber123", Email: pingram.PtrString("subscriber@example.com")},
Email: &pingram.SenderPostBodyEmail{
Subject: pingram.PtrString("Your Company Newsletter"),
Html: pingram.PtrString("<h1>New features are now available!</h1>"),
},
Options: &pingram.SenderPostBodyOptions{
Email: &pingram.SenderPostBodyOptionsEmail{
FromAddress: pingram.PtrString("newsletter@yourcompany.com"),
FromName: pingram.PtrString("Your Company Newsletter"),
},
},
}
_, _, err := client.DefaultAPI.Send(context.Background()).SenderPostBody(body).Execute()
if err != nil {
log.Fatal(err)
}
}using Pingram;
using Pingram.Model;
var client = new PingramClient("your_api_key");
var body = new SenderPostBody
{
Type = "marketing_newsletter",
To = new SenderPostBodyTo { Id = "subscriber123", Email = "subscriber@example.com" },
Email = new SenderPostBodyEmail("Your Company Newsletter", "<h1>New features are now available!</h1>"),
Options = new SenderPostBodyOptions(new SenderPostBodyOptionsEmail(fromAddress: "newsletter@yourcompany.com", fromName: "Your Company Newsletter"))
};
await client.SendAsync(body);SenderPostBodyTo to = new SenderPostBodyTo()
.id("subscriber123")
.email("subscriber@example.com");
SenderPostBody body = new SenderPostBody()
.type("marketing_newsletter")
.to(to)
.email(new SenderPostBodyEmail()
.subject("Your Company Newsletter")
.html("<h1>New features are now available!</h1>")
)
.options(new SenderPostBodyOptions()
.email(new SenderPostBodyOptionsEmail()
.fromAddress("newsletter@yourcompany.com")
.fromName("Your Company Newsletter")
)
);
SenderPostResponse response = pingram.send(body);require 'pingram'
client = Pingram::Client.new(api_key: 'pingram_sk_...')
body = Pingram::SenderPostBody.new(
type: 'marketing_newsletter',
to: { id: 'subscriber123', email: 'subscriber@example.com' },
email: { subject: 'Your Company Newsletter', html: '<h1>New features are now available!</h1>' },
options: { email: { from_address: 'newsletter@yourcompany.com', from_name: 'Your Company Newsletter' } }
)
client.send(body)To use a custom fromAddress from your domain, you’ll need to verify your domain first. See your Pingram dashboard under Settings -> Domain Verification for setup instructions. We strongly recommend you to verify your domain before sending emails from production.
Email Editor
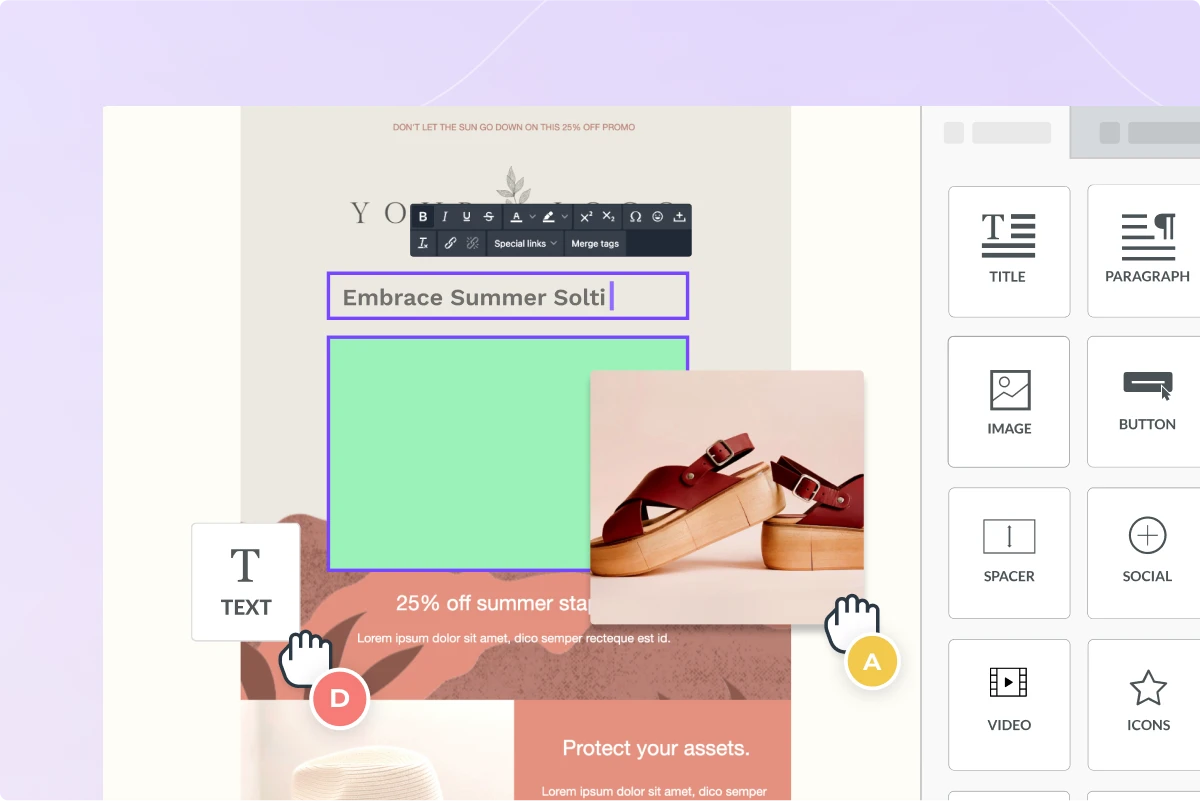
To remove the burden of manually building email templates, we have integrated a fully loaded email editor. Now everyone on your team can create and modify your email notifications without coding.
- Drag and drop editor
- Image, GIF, and video support
- Mobile responsive & mobile preview
- Save and re-use email parts like headers and footers
Important Email Features
Pingram provides comprehensive email functionality with advanced features:
- High delivery through SPF, DKIM and DMARC - see your dashboard for domain verification setup
- Compliant with Google’s and Yahoo’s email sender policies and best practices for high deliverability
- Merge tags (injecting dynamic values into the email content) - see docs
- Pre-built Unsubscribe Link and Web Page - see docs. To capture unsubscribe events in your backend, see Events Webhook.
- Reply-to addresses for two-way email communication via
options.email.replyToAddresses- see docs - File attachments via
options.email.attachments- see docs - CC and BCC recipients via
options.email.ccAddressesandoptions.email.bccAddresses- see docs
You DON’T need another 3rd-party email service like SendGrid or SES. Through our partnerships, We allocate and manage any required email infrastructure, even dedicated IPs, for you.
Google and Yahoo Bulk Sender Requirements
Pingram automatically handles compliance with Google and Yahoo bulk sender requirements (read more on our blog):
- Authentication: SPF, DKIM, DMARC configured automatically
- Unsubscribe: One-click unsubscribe headers and links included per RFC 2369 and RFC 8058
- Compliance: All requirements handled automatically in your account setup
In light of recent announcements by Google and Yahoo, it has become mandatory for bulk email senders to implement various requirements in place to reduce spam. Our account setup process ensures that you are compliant with these requirements by configuring SPF, DKIM, DMARC correctly.
Moreover, it’s essential to ensure that your emails support an easy, one-click unsubscribe process for end-users. This includes incorporating a clearly visible unsubscribe link within the body of your messages and providing unsubscribe end-points in the email header. Pingram fully supports these functionalities, adhering to the standards set forth by RFC 2369 and RFC 8058. Our system automatically includes the necessary header and an unsubscribe footer in your outgoing messages, providing your recipients with a straightforward method to opt-out of future communications.
Tracking and Analytics
Pingram automatically tracks:
- Delivery: Email successfully delivered to mail server
- Bounces: Failed delivery attempts
- Complaints: Users marking emails as spam
- Opens: Users opening the email
- Clicks: Users clicking on links in the email
Pingram uses a custom domain for all tracking links included in your emails. This means that any tracking links in your email are instrumented with a custom domain, allowing us to accurately track when your email is opened and when a recipient clicks on a link.
View all analytics in your dashboard under Logs and Insights.
Events Webhook
Following are the events that you can receive via Events Webhook:
- Deliveries
- Failures
- Opens
- Clicks
- Unsubscribes
- Inbound replies
If you want to set up a webhook for these events (such as opens and clicks), see our Events Webhook documentation for setup instructions.
You can also receive an event when a user unsubscribes from an email via our Events Webhook (EMAIL_UNSUBSCRIBE).
Email Replies (Inbound Webhooks)
Pingram can capture replies to your email notifications and forward them to your application via webhooks. This enables use cases like:
- Creating support tickets from email replies
- Collecting user feedback
- Building conversational email flows
How it works:
- When you send an email, Pingram sets the reply-to address to a special address (e.g.,
reply-{trackingId}@replies.pingram.io) - When a recipient replies, Pingram processes the email
- The reply is forwarded to your configured webhook endpoint
- All replies are also visible in your Logs dashboard
Setup: Enable the EMAIL_INBOUND event in Webhook page. See our Inbound Messages documentation for full details and webhook payload format.
Your Own Email Team
Imagine having your own email team:
Our team monitors bounces and complaints and will reach out to you directly if we detect an alarming rate of such emails. You can also reach out to us any time to ask about best practices, to review your email content, or to help you troubleshoot a delivery issue.
For paying customers, we help transfer your existing email templates into our editor, and we can also help you build new ones.
Frequently Asked Questions
Do I need to configure SMTP to send emails?
No! Pingram handles all SMTP configuration and email infrastructure for you automatically. You don’t need to:
- Set up or configure SMTP servers
- Manage SMTP credentials
- Use third-party email services like SendGrid, Amazon SES, or Mailgun
- Deal with SMTP ports, authentication, or connection settings
Simply use our API to send emails, and we’ll handle all the underlying SMTP infrastructure, authentication (SPF, DKIM, DMARC), and delivery. For production use, you only need to verify your domain through DNS records - see Domain Verification for details.
Can I send emails without verifying my domain?
Yes! For testing and development, you can send emails immediately without any domain verification. Emails will be sent from our domain @pingram.io with no configuration required.
For production use, we strongly recommend verifying your domain so that:
- Emails come from your own domain (e.g.,
hello@yourcompany.com) - You have better deliverability and inbox placement
- Your brand is represented in the sender address
- You comply with email authentication best practices (SPF, DKIM, DMARC)
To verify your domain, go to Dashboard → Settings → Domain Verification and follow the step-by-step instructions to add DNS records. See our Domain Verification guide for detailed help.
Does NotificationAPI support using custom SMTP?
Not currently. SMTP support is on our product roadmap. If this is important for your use case, please reach out via our live chat or Slack to discuss timelines and when this could be integrated.
Need more help?
If you need help, reach out through our live chat or Slack community.